Jaw Plate Replacement Guide: Step-by-Step Process for Optimal Performance
Jaw plates are the heart of any jaw crusher, responsible for the actual crushing action. Knowing when and how to replace them can mean the difference between optimal performance and costly downtime. This comprehensive guide will walk you through the entire jaw plate replacement process.
Table of Contents
- When to Replace Jaw Plates
- Pre-Replacement Preparation
- Step-by-Step Replacement Procedure
- Installation Best Practices
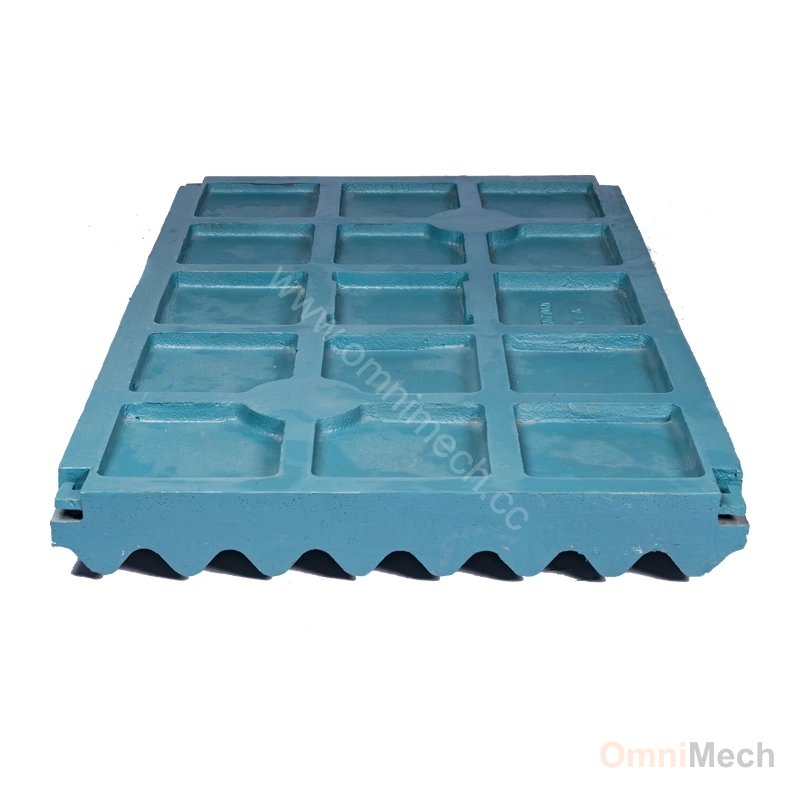
- Jaw Plate Selection Guide
- Extending Jaw Plate Lifespan
- Common Replacement Mistakes
- Cost-Benefit Analysis
- 2026 Trends in Jaw Plate Technology
- Frequently Asked Questions
When to Replace Jaw Plates
Wear Indicators
Visual Inspection Signs
- Excessive wear on the crushing surface
- Cracks or fractures
- Chipping or peeling edges
- Uneven wear patterns
- Loss of serration or tooth profile
Performance Indicators
- Reduced production capacity
- Increased power consumption
- Larger particle size in discharge
- Unusual noise or vibration
- Higher frequency of jams
Measurement Thresholds
- Wear exceeding 70-80% of original thickness
- Reduction in jaw plate height by more than 25%
- Gap between jaws exceeding design specifications
- Loss of 30% or more in crushing efficiency
Pre-Replacement Preparation
Safety Precautions
Lockout/Tagout (LOTO)
- Disconnect main power supply
- Apply lockout devices to prevent accidental startup
- Display warning tags on all control points
- Verify zero energy state before starting work
Personal Protective Equipment
- Safety glasses with side shields
- Heavy-duty work gloves
- Steel-toe boots
- Hard hat
- Hearing protection
- Dust mask or respirator
Tools and Equipment
- Heavy-duty wrench set (36mm-50mm)
- Hydraulic jack or lifting equipment
- Socket set with impact driver
- Torque wrench (pre-calibrated)
- Pry bars and hammers
- Measuring tools (calipers, tape measure)
- Clean rags and lubricant
- Replacement jaw plates and hardware
Work Area Preparation
- Clear the area around the crusher
- Set up proper lighting
- Prepare containers for removed parts
- Ensure adequate workspace for maneuvering
- Have first aid kit readily available
Step-by-Step Replacement Procedure
Step 1: Remove Old Jaw Plates
Access the Jaw Chamber
- Open side access doors
- Remove any guards or safety covers
- Clean the area of debris
Loosen Mounting Hardware
- Identify all bolts and wedge systems
- Apply penetrating oil to rusted threads
- Use impact wrench to loosen bolts gradually
- Support jaw plates during removal
Extract Jaw Plates
- Use pry bars to loosen plates from their seats
- Lift plates using appropriate lifting equipment
- Carefully maneuver plates out of the chamber
- Inspect mounting surfaces for damage
Step 2: Prepare Mounting Surfaces
Clean and Inspect
- Remove all debris and rust
- Check for cracks or damage
- Verify flatness of mounting surfaces
- Measure alignment points
Repair if Necessary
- Fix any damaged mounting points
- Replace worn or damaged wedge systems
- Ensure proper surface finish
- Apply anti-seize compound to threads
Step 3: Install New Jaw Plates
Position New Plates
- Align jaw plates correctly
- Ensure proper orientation (fixed vs. swing jaw)
- Check alignment marks if provided
- Verify clearance specifications
Secure Mounting Hardware
- Install bolts and wedges in proper sequence
- Tighten to manufacturer’s torque specifications
- Verify even pressure distribution
- Check jaw gap measurements
Final Inspection
- Verify all bolts are properly torqued
- Check for any loose parts
- Ensure safety guards are in place
- Test jaw movement manually
Installation Best Practices
Proper Alignment
- Use alignment tools if available
- Verify parallelism between jaw plates
- Check for proper gap setting
- Ensure plates are centered in the chamber
Torque Specifications
| Component | Torque Value (Nm) | Recommended Tools |
|---|---|---|
| Jaw plate bolts | 350-450 | Torque wrench |
| Wedge bolts | 250-300 | Impact driver |
| Toggle plate bolts | 200-250 | Socket wrench |
Lubrication Considerations
- Apply anti-seize to all threaded connections
- Lubricate pivot points as specified
- Use high-temperature lubricants if needed
- Avoid over-lubrication which can attract dust
Testing Procedures
Manual Test
- Check jaw movement without power
- Verify smooth operation
- Ensure no binding or interference
Initial Run
- Start crusher at low speed
- Monitor for unusual noise or vibration
- Check temperature of bearings and components
- Gradually increase to full operating speed
Production Test
- Run with small amount of material
- Check product size and consistency
- Monitor power consumption
- Verify throughput meets expectations
Jaw Plate Selection Guide
Material Considerations
Manganese Steel (Mn13)
- Excellent wear resistance
- Good impact toughness
- Self-hardening properties
- Suitable for most applications
High Manganese Steel (Mn18)
- Superior wear resistance
- Better for abrasive materials
- Higher initial cost
- Longer service life
Composite Materials
- Ceramic inserts for extreme abrasion
- Carbide tips for high-impact applications
- Advanced alloys for specific materials
Design Features
Tooth Profile
- Aggressive teeth for hard materials
- Blunt teeth for softer materials
- Serrated edges for better grip
- Smooth surfaces for sticky materials
Weight and Thickness
- Standard thickness: 80-120mm
- Heavy-duty options: 120-150mm
- Custom designs available
Manufacturing Quality
- Cast vs. forged construction
- Heat treatment processes
- Quality control standards
- Warranty considerations
Extending Jaw Plate Lifespan
Operational Practices
Optimal Feed Control
- Maintain consistent feed rate
- Avoid overloading the crusher
- Use proper feed distribution
- Control feed particle size
Crusher Settings
- Maintain proper jaw gap
- Adjust according to material type
- Monitor and adjust as wear occurs
- Avoid excessive reduction ratios
Regular Inspection
- Daily visual inspections
- Weekly measurement checks
- Monthly performance analysis
- Document wear patterns
Maintenance Practices
Proper Lubrication
- Follow manufacturer recommendations
- Use high-quality lubricants
- Maintain clean lubrication systems
- Monitor oil condition
Alignment Checks
- Verify jaw alignment regularly
- Check for frame distortion
- Ensure proper foundation
- Adjust as needed
Cooling Considerations
- Maintain proper ventilation
- Monitor operating temperatures
- Avoid overheating conditions
- Implement cooling systems if needed
Common Replacement Mistakes
Installation Errors
Incorrect Torque
- Under-tightening causes movement and wear
- Over-tightening can damage threads or plates
- Always use calibrated torque wrenches
- Follow manufacturer specifications
Misalignment
- Uneven wear patterns
- Reduced crushing efficiency
- Increased power consumption
- Premature failure
Wrong Part Selection
- Using incorrect material grade
- Wrong size or configuration
- Incompatible design features
- Non-OEM parts with poor quality
Operational Mistakes
Rushing the Process
- Skipping safety procedures
- Inadequate cleaning and preparation
- Poor alignment verification
- Insufficient testing
Ignoring Warning Signs
- Continuing operation with damaged plates
- Not addressing wear issues promptly
- Allowing secondary damage to occur
- Increasing repair costs
Improper Handling
- Dropping or damaging new plates
- Scratching or marring surfaces
- Contaminating mounting points
- Reducing effectiveness
Cost-Benefit Analysis
Replacement Cost Factors
Purchase Price
- OEM vs. aftermarket parts
- Material quality and grade
- Custom vs. standard designs
- Quantity discounts
Labor Costs
- Technician hourly rates
- Equipment downtime
- Preparation and cleanup
- Testing and verification
Indirect Costs
- Production loss during replacement
- Inventory carrying costs
- Transportation and logistics
- Disposal of old parts
ROI Considerations
Optimal Replacement Timing
- Replace at 70-80% wear for best ROI
- Early replacement wastes capital
- Delayed replacement causes secondary damage
- Monitor wear patterns and plan accordingly
Extended Lifespan Benefits
- Properly maintained plates last 30-50% longer
- Reduced frequency of replacements
- Lower overall maintenance costs
- More predictable budgeting
Performance Improvements
- New plates restore full crushing capacity
- Improved product quality and consistency
- Reduced energy consumption
- Lower operational costs
2026 Trends in Jaw Plate Technology
Advanced Materials
- AI-Optimized Alloys
- Computer-designed material compositions
- Enhanced wear resistance through machine learning
- Predictive material performance modeling
- Customized alloys for specific applications
Smart Monitoring Systems
Embedded Sensors
- Real-time wear measurement
- Temperature monitoring
- Vibration analysis
- Predictive failure detection
IoT Integration
- Remote monitoring capabilities
- Automated maintenance scheduling
- Data-driven replacement recommendations
- Cloud-based analytics
Sustainable Practices
Recyclable Materials
- Reduced environmental impact
- Closed-loop manufacturing
- Sustainable sourcing
- Carbon footprint reduction
Energy Efficiency
- Optimized designs for lower power consumption
- Heat recovery systems
- Energy monitoring and optimization
- Green technology integration
Frequently Asked Questions
1. How often should jaw plates be replaced?
Jaw plate replacement frequency depends on several factors including material type, production volume, and operating conditions. On average, jaw plates need replacement every 2-6 months in high-production environments, and 6-12 months in moderate use.
2. What causes uneven jaw plate wear?
Uneven wear is typically caused by:
- Improper feed distribution
- Misaligned jaw plates
- Uneven torque application
- Variations in feed material
- Foundation or frame issues
3. Can I flip or rotate jaw plates to extend life?
Yes, many jaw plates can be rotated 180 degrees when one side wears, effectively doubling their usable life. Some designs also allow flipping top-to-bottom. Always follow manufacturer recommendations.
4. What is the best material for jaw plates?
Manganese steel (Mn13) is the industry standard for most applications due to its excellent combination of wear resistance and toughness. For highly abrasive materials, consider high manganese steel (Mn18) or composite materials.
5. How do I properly store spare jaw plates?
Store jaw plates in a dry, climate-controlled environment, preferably on wooden pallets or racks. Keep them covered to prevent rust and protect the surface finish. Avoid stacking heavy items on top of them.
6. Can I mix different brands of jaw plates?
While technically possible, mixing different brands is not recommended. Different manufacturers use different material compositions, heat treatments, and design tolerances that may not be compatible.
7. What safety precautions are most important?
The most critical safety precautions are:
- Proper lockout/tagout procedures
- Using appropriate lifting equipment
- Wearing proper PPE
- Following manufacturer guidelines
- Working with a trained team
8. How do I determine the correct jaw gap setting?
Jaw gap setting depends on your desired product size. Use manufacturer specifications as a starting point and adjust based on:
- Material properties
- Production requirements
- Wear patterns
- Energy consumption
9. What is the average cost of jaw plate replacement?
Costs vary significantly based on:
- Crusher size and type
- Material quality
- Labor rates
- Production downtime
- Additional maintenance needed
10. How can I track jaw plate performance?
Implement a comprehensive tracking system that records:
- Installation date
- Operating hours
- Production volume
- Material type processed
- Wear measurements
- Replacement costs
Need assistance with jaw plate replacement?
Our team of experts can provide technical support, replacement parts, and maintenance services to keep your jaw crusher operating at peak performance. Contact us today for personalized recommendations and competitive pricing.
Contact Crusher Parts International | View Jaw Plate Products
Tags:
OmniMech Engineering Team
Technical expert at Crusher Parts International with years of experience in the crushing and mining industry.